Getting a new air purifier running correctly takes six actions: unbox and inspect the unit, remove all protective packaging from the filters, fit the pre-filter and HEPA/carbon filters in the correct order, choose a placement with 2–3 metres of clear space following the CADR-based 2/3 sizing rule, plug in and run an initial high-speed cycle for 30–60 minutes, then connect to the app or register the device if your model is smart-enabled.
Most first-use problems trace back to one mistake: leaving the plastic wrapping on the filters. Manufacturer guides and how-to resources confirm that running a unit with filter packaging still on restricts airflow, strains the motor, and can cause persistent noise or error lights. Catching this before you press the power button saves a service call.
Quick setup checklist:
- Remove all plastic bags and foam inserts from filters and the interior compartment
- Install filters in the correct order (pre-filter first, then HEPA, then activated carbon)
- Place the unit with adequate clearance on all sides, away from walls and furniture
- Plug directly into a grounded wall outlet
- Run on the highest fan speed for 30–60 minutes before switching to Auto
- Register the device or connect to the app if applicable
Pro Tip: Open the filter compartment before you plug in the unit. Physically check that every filter is unwrapped and seated flush. This single step prevents the most common first-use fault.
Key takeaways
A correctly set up air purifier, with all packaging removed, filters seated in the right order, and placed with adequate clearance, will deliver its rated CADR from day one and require only routine pre-filter cleaning and periodic filter replacement to maintain that performance.
| Point | Details |
|---|---|
| Remove all packaging first | Plastic bags left on filters restrict airflow and can damage the motor on first use. |
| Install filters in correct order | Pre-filter, then HEPA, then activated carbon — check orientation markers before closing the panel. |
| Apply the 2/3 sizing rule | Smoke CADR should be at least two-thirds of the room’s floor area in square feet for adequate air changes. |
| Run Turbo for the first 30–60 minutes | The initial high-speed cycle clears factory dust and brings the room to rated CADR quickly. |
| Clean the pre-filter every 2–4 weeks | Regular pre-filter maintenance protects HEPA media and extends filter life. |
| Climatepro for filters and models | Climatepro stocks genuine replacement filters and curated purifier models suited to a range of room sizes. |
Always consult your product manual for model-specific instructions, reset procedures, and warranty conditions.
Table of Contents
- Step-by-step air purifier setup from unboxing to first run
- How long should you run the purifier on the first day?
- Understanding the controls: fan speeds, Auto, Sleep and filter reset
- Connecting smart models to Wi-Fi and the companion app
- Keeping the purifier efficient: pre-filter cleaning and filter replacement
- Quick fixes for common first-use problems
- How an air purifier actually cleans room air
- Safety notes and Australia-specific tips
- A practical perspective on first-time setup
- Genuine replacement filters and recommended models from Climatepro
- Useful manufacturer manuals and authoritative guides
- Sources
Step-by-step air purifier setup from unboxing to first run
1. Unboxing and parts check
Lay the unit on a flat surface and remove all outer packaging. Check the box contents against the parts list in the manual: the main unit, power cord, and all filter components should be present. Inspect the outer casing for transit damage before proceeding. Keep the manual and warranty card together — you will need the model number for filter replacements and any warranty claims.
2. Remove all protective packaging from filters
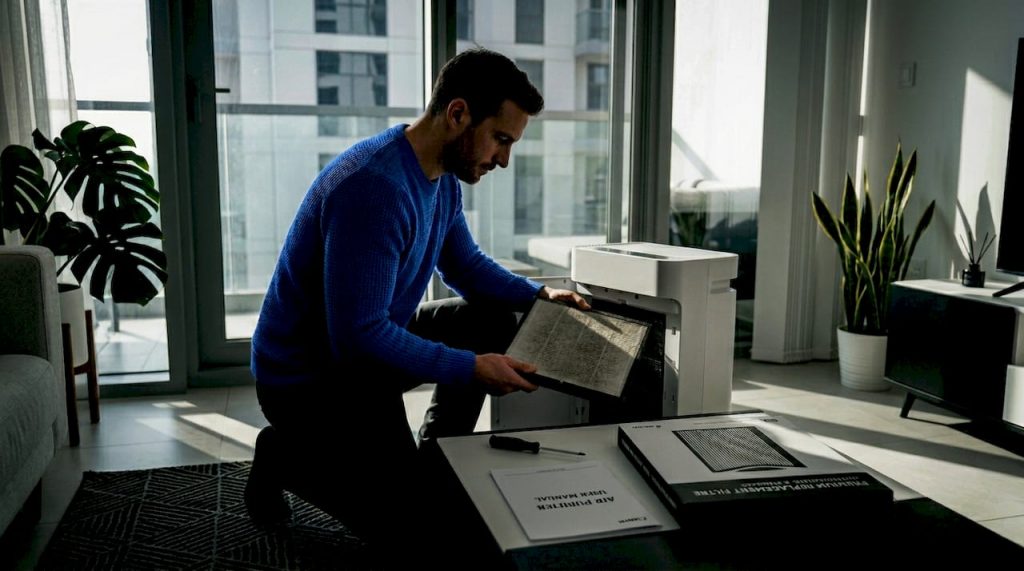
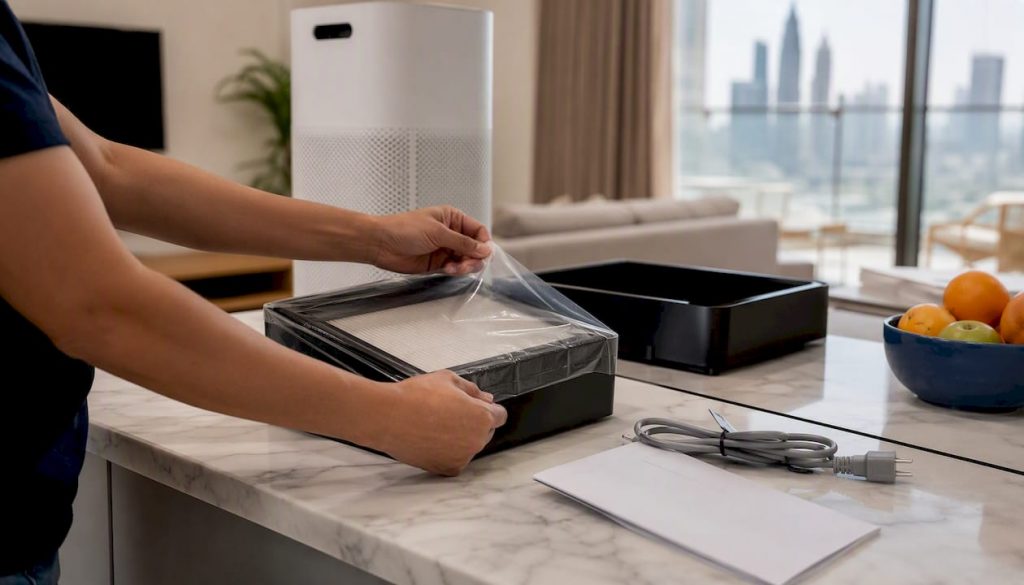
Open the filter compartment (usually a rear or side panel) and remove every filter. Each filter is typically wrapped in a clear plastic bag or sealed with tape. Remove all of it. Check inside the compartment itself for foam inserts or cardboard spacers used during shipping.
Running an air purifier with filter packaging still in place restricts airflow, forces the motor to work harder than designed, and can cause permanent damage. Turn the unit off immediately if you hear unusual humming or notice weak airflow on first start, and recheck the filters before continuing.
Honeywell’s first-time setup instructions list packaging removal as a mandatory step before filter installation, alongside running an initial Turbo cycle. Sharp’s setup guide follows the same sequence: unbox, remove packaging, fit filters, power on.
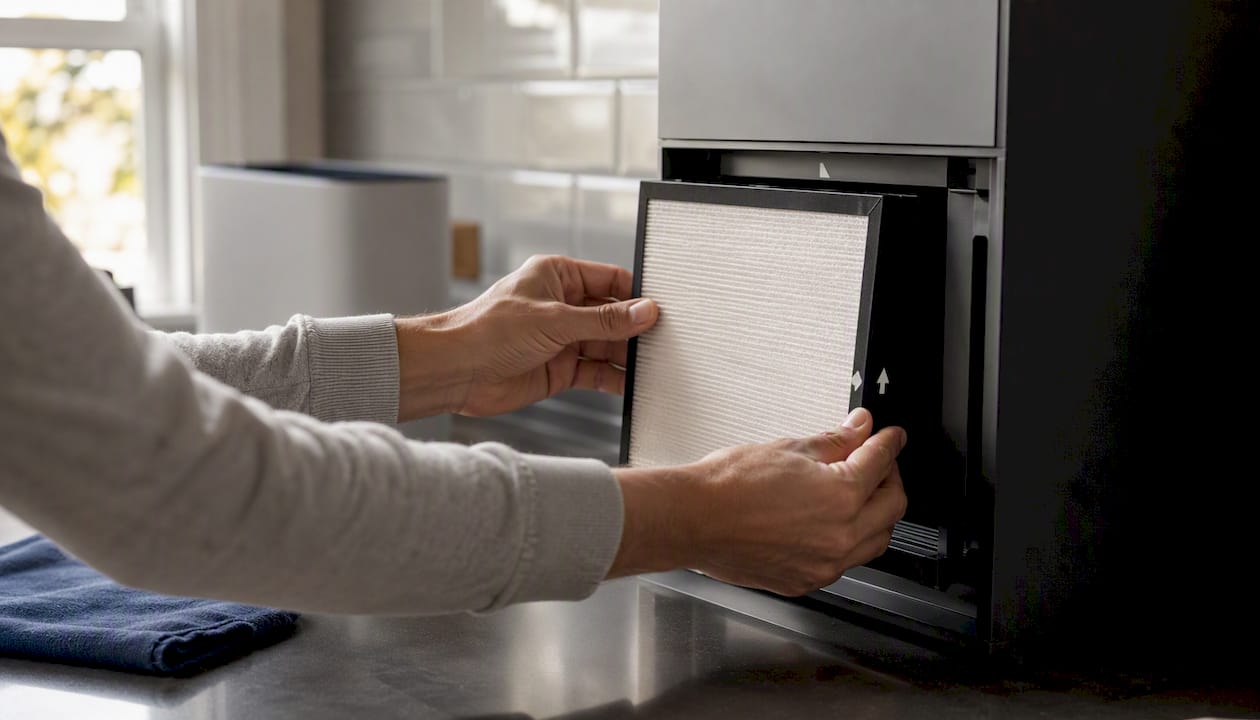
3. Install filters in the correct order
Most purifiers use a layered filter stack. The standard order is:
- Pre-filter (outermost, captures large particles like dust and pet hair)
- HEPA filter (captures fine particulates down to 0.3 microns)
- Activated carbon filter (adsorbs gases, VOCs, and odours)
LG’s installation guidance stresses checking the “top” orientation marker on each filter and confirming that panels and tabs click or sit flush. A filter seated at an angle breaks the seal and lets unfiltered air bypass the media entirely. Some models combine HEPA and carbon into a single unit — check your manual for the exact configuration.
Pro Tip: Most filters have an arrow or “this side up” label. Match it to the corresponding marker inside the compartment before closing the panel.
4. Choose the right placement
Position the unit where air can circulate freely around it. Practical rules of thumb:
- Maintain at least adequate clearance on all sides (front, back, and top)
- Place in the room where you spend the most time, or nearest to the pollution source
- Bedrooms: position near the bed but not directly blowing on the sleeper
- Living rooms: central placement or near high-traffic areas
- Kitchens: near cooking areas but away from steam and grease splatter
- Avoid corners, inside wardrobes, or behind furniture
For sizing, AHAM’s air filtration standards underpin the widely used 2/3 rule: the unit’s Smoke CADR rating should be at least two-thirds of the room’s floor area in square feet. A room of 20 square metres (roughly 215 square feet) needs a Smoke CADR of at least 143. If your unit falls short of that figure for the room you have chosen, move it to a smaller space or run it on a higher fan speed. More detail on sizing and CADR guidance is available for readers comparing models.
5. Power on and run the initial cycle
Plug the unit directly into a grounded wall outlet. If your manufacturer’s manual warns against power strips or extension leads, follow that instruction — some models draw enough current at Turbo speed to trip a shared circuit. Set the fan to its highest speed and let it run for 30–60 minutes. This initial purge clears factory dust from the filter media and quickly reduces airborne particles in the room.
Safety checklist before powering on:
- Confirm the power cord is undamaged
- Check that intake and exhaust vents are unobstructed
- Verify the unit is on a stable, flat surface
- Keep the unit away from water sources and humid areas such as bathrooms
After the initial cycle, check that airflow from the exhaust is steady and strong, that noise is consistent with the fan speed selected, and that no burning or chemical smell persists beyond the first few minutes.
How long should you run the purifier on the first day?
Run the unit on the highest fan speed for an initial period to quickly clear factory dust and particulates. High speed is necessary at this stage because it drives the unit to its rated Clean Air Delivery Rate (CADR), which is the volume of filtered air the purifier produces per hour. Running on Low during the first cycle will not clear factory dust from the filter media or reduce room particulates as quickly.
After the initial purge, step down to Auto or a medium setting. Verify the following during the first run:
- Airflow: steady and consistent from the exhaust vent
- Noise: matches the expected level for the fan speed selected (refer to the manual’s dB ratings if listed)
- Smell: a faint new-product odour for the first 10–15 minutes is normal; a persistent burning smell is not
- Vibration: minor vibration is normal at high speed; rattling or grinding is not
If any of these checks fail, turn the unit off and recheck filter seating and packaging removal before contacting support.
Understanding the controls: fan speeds, Auto, Sleep and filter reset
Most air purifiers share a common set of modes, though the labels vary by brand.
- Auto mode: the unit reads its built-in air quality sensor and adjusts fan speed automatically. It is the right setting for continuous, unattended operation. Note that Auto may not reach Turbo-level CADR during periods of mild pollution — if you need fast clean-up after cooking or a dusty activity, switch to Turbo manually.
- Turbo / High: maximum CADR output. Use for short periods (15–30 minutes) after cooking, cleaning, or when smoke or dust levels spike.
- Sleep mode: reduces fan speed and dims indicator lights for quiet overnight operation. Useful in bedrooms, though CADR is lower than Auto.
- Timer: sets the unit to run for a fixed period and then power off. Useful for pre-cooling a room before sleep.
- Child lock: disables the control panel to prevent accidental changes. Activate it if young children or pets can reach the unit.
Filter-life indicator: most units display a light or icon when the filter needs attention. After replacing a filter, reset the indicator by holding the filter-reset button (usually labelled “Filter Reset” or shown by a filter icon) for 3–5 seconds until the light clears. The exact method varies by model — consult your manual for the specific reset sequence.
Pro Tip: Running the purifier on Auto 24/7 gives you consistent baseline air quality at a lower energy draw than Turbo. Reserve Turbo for specific events. This approach, recommended by practical usage guides, balances performance and running costs effectively. For more on energy-efficient air cleaning workflows, the Climatepro blog covers the trade-offs in detail.
Connecting smart models to Wi-Fi and the companion app
Not every purifier has smart features, but if yours does, pairing it correctly on day one avoids frustration later.
- Download the manufacturer’s companion app from the App Store or Google Play before powering on the purifier.
- Create an account or log in if you already have one.
- Switch your phone’s Wi-Fi to your 2.4 GHz network. Most smart purifiers do not support 5 GHz bands during pairing.
- Follow the in-app pairing prompts — typically: tap “Add Device,” select your purifier model, and hold the Wi-Fi button on the unit until the indicator flashes.
- Confirm the device appears in the app with a live air quality reading before closing the setup screen.
If pairing fails, move your phone within one metre of the purifier, confirm the Wi-Fi password is correct, and restart both the router and the purifier before retrying.
Treat your air purifier like any other connected home device: use a strong, unique Wi-Fi password, consider placing IoT devices on a separate guest network, and review the app’s permissions to limit data sharing to what is genuinely needed.
Keeping the purifier efficient: pre-filter cleaning and filter replacement
Maintenance is straightforward when it follows a regular schedule. The pre-filter is the first line of defence and the easiest to maintain.
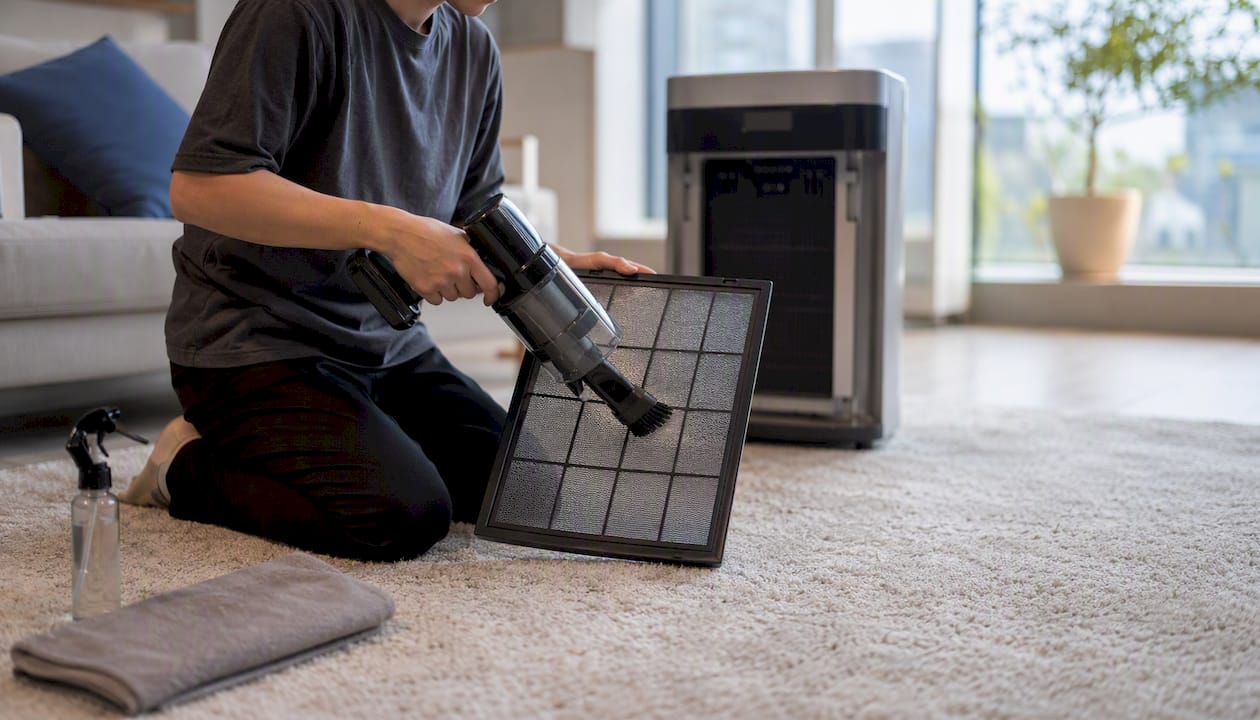
Always unplug the unit before cleaning or replacing any filter.
Cleaning the pre-filter
The pre-filter captures large particles and is usually washable or vacuumable. Clean it every 2–4 weeks, or more frequently in dusty environments or homes with pets. To clean:
- Remove the pre-filter from the compartment.
- Vacuum loose dust with a soft brush attachment, or rinse under cool water if the manual confirms it is washable.
- Allow it to dry completely before reinstalling — a damp filter can promote mould growth inside the unit.
- Reinstall and close the compartment before plugging back in.
HEPA and carbon filter replacement
HEPA filters typically last 6–12 months under normal use. Activated carbon filters often need replacement every 3–6 months, particularly in homes with strong odours, cooking fumes, or VOC sources. Follow the unit’s filter-life indicator rather than a fixed calendar where possible, as actual lifespan depends on air quality and hours of use.
A simple maintenance schedule:
- Weekly: wipe the exterior with a dry cloth; check that vents are clear
- Every 2–4 weeks: clean or vacuum the pre-filter
- Every 3–6 months: replace the activated carbon filter (check indicator)
- Every 6–12 months: replace the HEPA filter (check indicator)
Pro Tip: Stock a spare HEPA filter before the indicator triggers. During wildfire smoke events or high-pollution periods in Australia, replacement filters can sell out quickly. Having one on hand means no gap in protection.
Genuine replacement filters are available through Climatepro for a range of models.
Quick fixes for common first-use problems
Unit will not power on
- Check the wall outlet is live (test with another device)
- Try a different socket
- Inspect the power cord for visible damage
- Confirm the filter compartment door is fully closed — most units will not start if the panel is ajar
- Verify all filter packaging has been removed
Low airflow or loud humming
Low airflow on first use almost always means packaging is still on a filter. Turn the unit off, open the compartment, and check every filter. Manufacturer troubleshooting guides confirm this is the primary cause of restricted airflow and motor noise at first start. Also check that the intake and exhaust vents are not pressed against a wall or piece of furniture.
Odd smells or burning odour
A faint chemical or “new product” smell in the first 10–15 minutes is normal as the filter media warms up. A persistent burning smell is not. Turn the unit off immediately, allow it to cool, and inspect filters for any remaining packaging. If the smell continues after a second start, contact the manufacturer’s support line.
Error lights or fault codes
Consult the manual’s error code table. Most codes relate to filter status or sensor faults. Power-cycle the unit (unplug, wait 30 seconds, replug) and check whether the code clears. If it persists, note the code and contact the manufacturer’s support team with your model number and purchase date.
How an air purifier actually cleans room air
Understanding the process helps explain why placement, filter order, and fan speed all matter.
- Intake: the fan draws room air through the intake vents
- Pre-filter stage: large particles (dust, hair, pollen) are captured by the mesh pre-filter
- HEPA stage: fine particulates down to 0.3 microns — including smoke, mould spores, and fine dust — are trapped by the HEPA media
- Activated carbon stage: gases, VOCs, cooking odours, and chemical fumes are adsorbed by the carbon layer
- Clean air exhaust: filtered air is pushed back into the room through the exhaust vent
CADR (Clean Air Delivery Rate) measures how much filtered air the unit delivers per hour, expressed in cubic feet per minute (CFM) or cubic metres per hour. A higher fan speed produces a higher CADR. Air Changes per Hour (ACH) describes how many times the unit processes the full room volume in one hour — most guides recommend a minimum of 4–5 ACH for allergy or asthma sufferers. Both figures depend on the unit running at the fan speed used during testing, which is why placement and fan speed selection directly affect real-world performance.
Safety notes and Australia-specific tips
Electrical safety
Plug the unit into a grounded (earthed) wall outlet. Australian standard AS/NZS 3112 governs plug and socket design — if your purifier came with an adapter or a non-standard plug, confirm it is rated for Australian voltage (230 V, 50 Hz) before use. Avoid extension leads unless the manufacturer explicitly permits them.
Moisture and placement
Keep the unit away from bathrooms, laundry areas, and any space where steam or water splatter is likely. LG’s installation guidance notes that operating outside recommended temperature and humidity ranges can affect performance and longevity.
Wildfire smoke and high-pollution events
Australia’s bushfire seasons can produce sustained periods of hazardous outdoor air quality. During smoke events:
- Close windows and doors to limit infiltration
- Run the purifier on Turbo until the air quality indicator shows improvement, then step down to Auto
- Consider sealing gaps around doors and windows with draught excluders for better results
- Replace filters more frequently during prolonged smoke exposure, as HEPA media loads faster under heavy particulate conditions
During a smoke event, a correctly sized and placed purifier running on its highest fan speed with sealed windows can meaningfully reduce indoor particulate levels. The key word is “correctly sized” — an undersized unit running on Turbo in a large room will not achieve adequate air changes.
Children and pets
- Place the unit on a stable surface where it cannot be knocked over
- Route the power cord away from areas where children or pets can reach it
- Activate the child lock if the model includes one
- Never place the unit where a child could press their face against the intake or exhaust vent
A practical perspective on first-time setup
The two mistakes that account for most first-use service calls are leaving filter packaging in place and positioning the unit in a corner or against a wall. Both are easy to avoid with a two-minute pre-start check, yet they remain common because the urgency to “just turn it on” overrides the setup steps.
Correct placement and sizing, backed by AHAM’s CADR guidance, are the factors that most determine whether a purifier delivers its advertised performance in a real room. A well-placed, correctly sized unit running on Auto 24/7 will outperform a more powerful unit shoved in a corner on a low setting. The checklist in this guide reflects the consensus from Honeywell, Sharp, and Levoit manufacturer instructions — not arbitrary advice.
On running costs: Auto mode 24/7 is the most practical approach for most households. It maintains baseline air quality at a lower energy draw than continuous Turbo, and the unit only ramps up when the sensor detects a genuine rise in particulates. Reserve Turbo for cooking, cleaning, or smoke events. That balance, covered in more depth in Climatepro’s guide to air purifier benefits for families, keeps both air quality and electricity bills in a sensible range.
Genuine replacement filters and recommended models from Climatepro
Climatepro stocks genuine replacement filters and a curated range of air purifiers suited to Australian homes, from compact bedroom units to larger living room models.

For readers who have just completed setup and want to stock a spare filter before the indicator triggers, Climatepro carries options including the Honeywell Air Touch P2 for medium rooms and the Honeywell Air Touch P1 for smaller spaces. The full range of air purifiers and replacement filters is available online with delivery across the UAE. Browse the catalogue, match your room size to the correct CADR rating, and order a spare filter at the same time as your unit so you are covered when the first replacement cycle arrives.
Useful manufacturer manuals and authoritative guides
- AHAM Air Filtration Standards — the authoritative source for CADR definitions and the 2/3 sizing rule used throughout this guide.
- Honeywell first-time setup guide — step-by-step unboxing, filter installation, and initial Turbo cycle instructions for Honeywell models.
- Sharp air purifier setup guide — concise setup sequence and troubleshooting tips for Sharp models.
- LG installation and product overview — filter orientation, environmental requirements, and performance notes for LG air purifiers.
- CNET air purifier installation guide — practical how-to covering packaging removal, placement, and first-use checks across multiple brands.
- FreshAirPicks usage guide — detailed advice on continuous operation, fan speed selection, and pre-filter maintenance schedules.
Sources
- A Step-by-Step Guide to Installing Your Air Purifier – CNET
- Installation and Product Overview Air Purifier | LG USA Support
- How to Set Up Your Air Purifier (Step-by-Step Guide) – Sharp support
- How To Use An Air Purifier For Max Clean Air (and Minimal Cost) – FreshAirPicks
- Air Filtration Standards – AHAM Verifide
Recommended
- Air purifier buying tips: how to choose the right one — Blog | ClimatePro UAE
- Levoit Core 300S air purifier: Guide to cleaner indoor air — Blog | ClimatePro UAE
- Air filter replacement: a clear step-by-step workflow — Blog | ClimatePro UAE
- How to use an air monitor for better home air — Blog | ClimatePro UAE